If you’re interested in starting a podcast, then one of the first questions you’ll ask is, “What kind of software do I need?” Well, if you’re a PC user (like me) then the answer is Audacity.
**If you’re a Mac User, you can use GarageBand. This will serve as your main software for audio editing and recording. But for the purpose of today’s post, we’re just going to cover the Basics of Audacity.
So, What Are the Basics of Audacity?
There are a few key areas that I want to focus on today. This isn’t going to be an all extensive tutorial on how to use Audacity. That would take hours of answering questions and going over strategies for producing the most perfect podcast in the world…
But ain’t nobody got time for that!
I just want to give you the quick and dirty info that you need in order to record your first podcast episode and continue on with your journey of launching a podcast.
Here are the Basic “Need-To-Knows” for Audacity:
- Recording/Playback
- Selection Tool
- Cutting/Deleting
- Timeshift tool
- Recording Volume adjustment
- Saving
- Importing
- Exporting
- Effects
- Zoom In & Zoom Out
So let’s go over the basics of each of these.
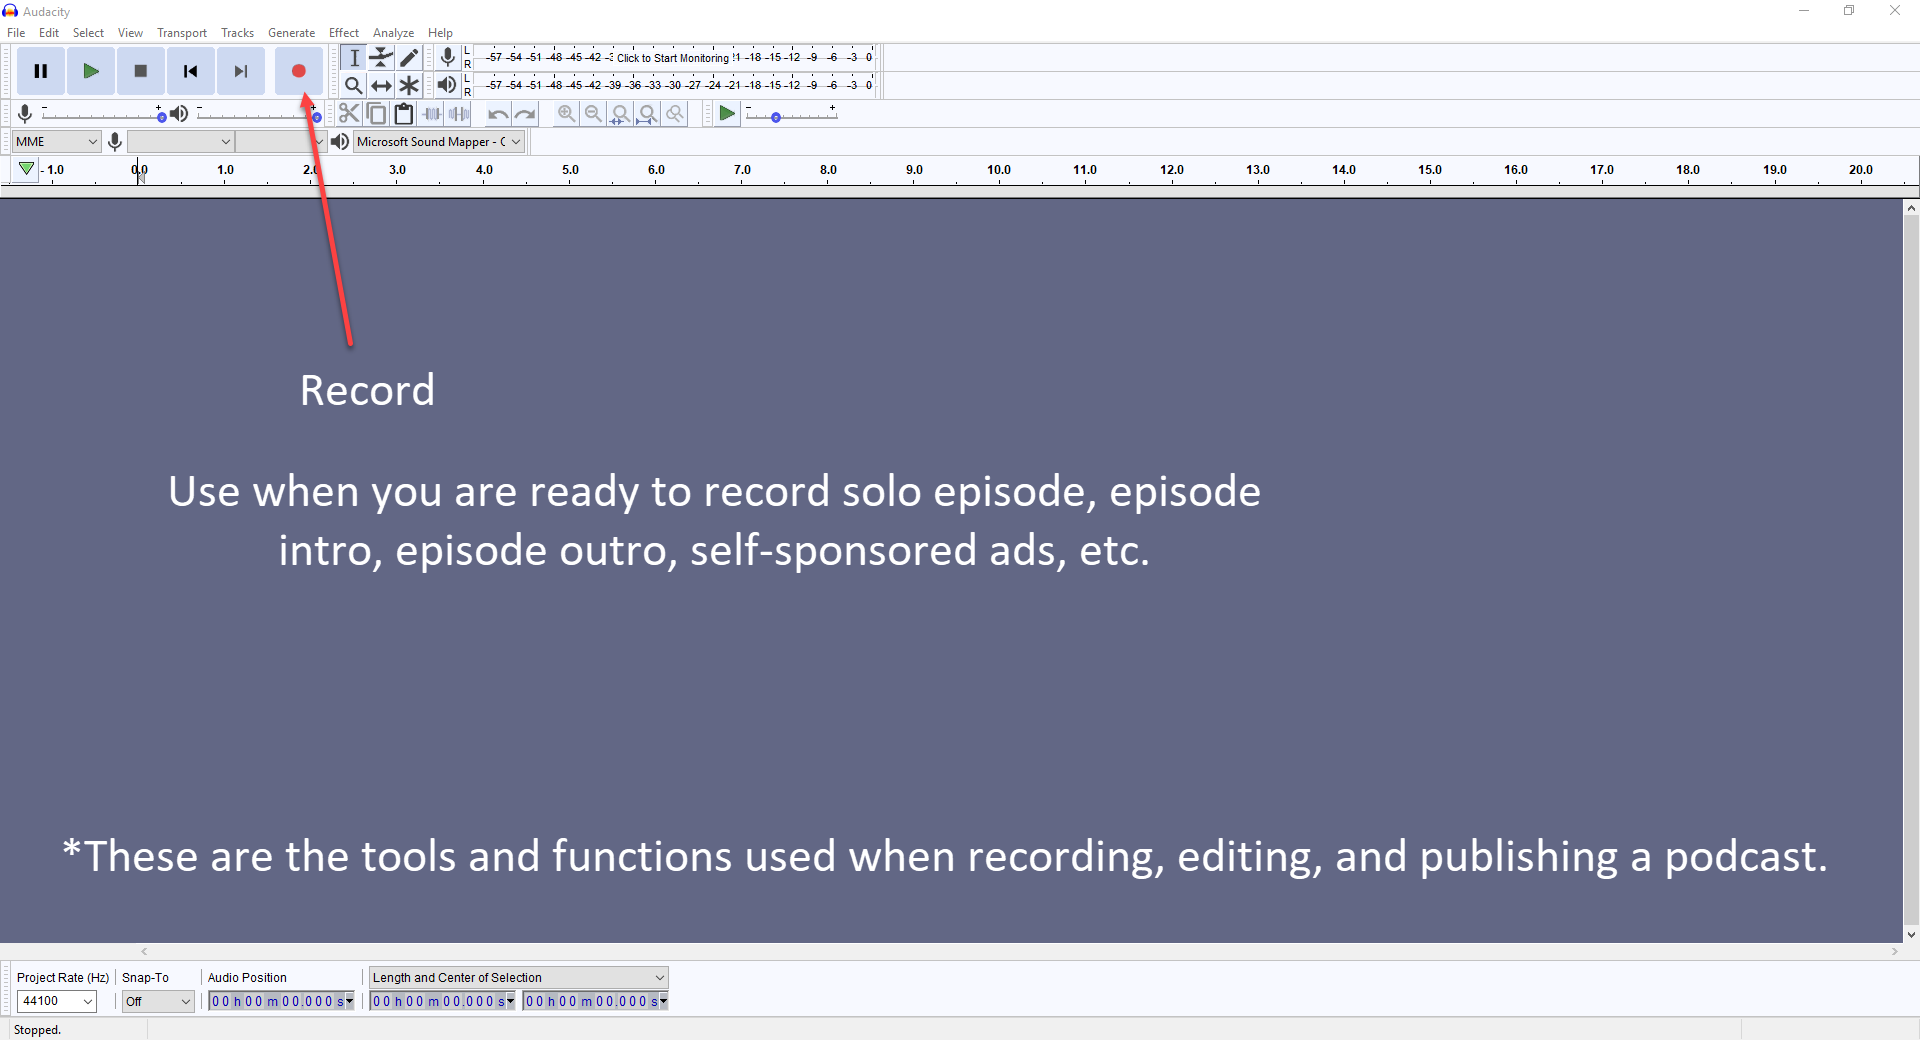
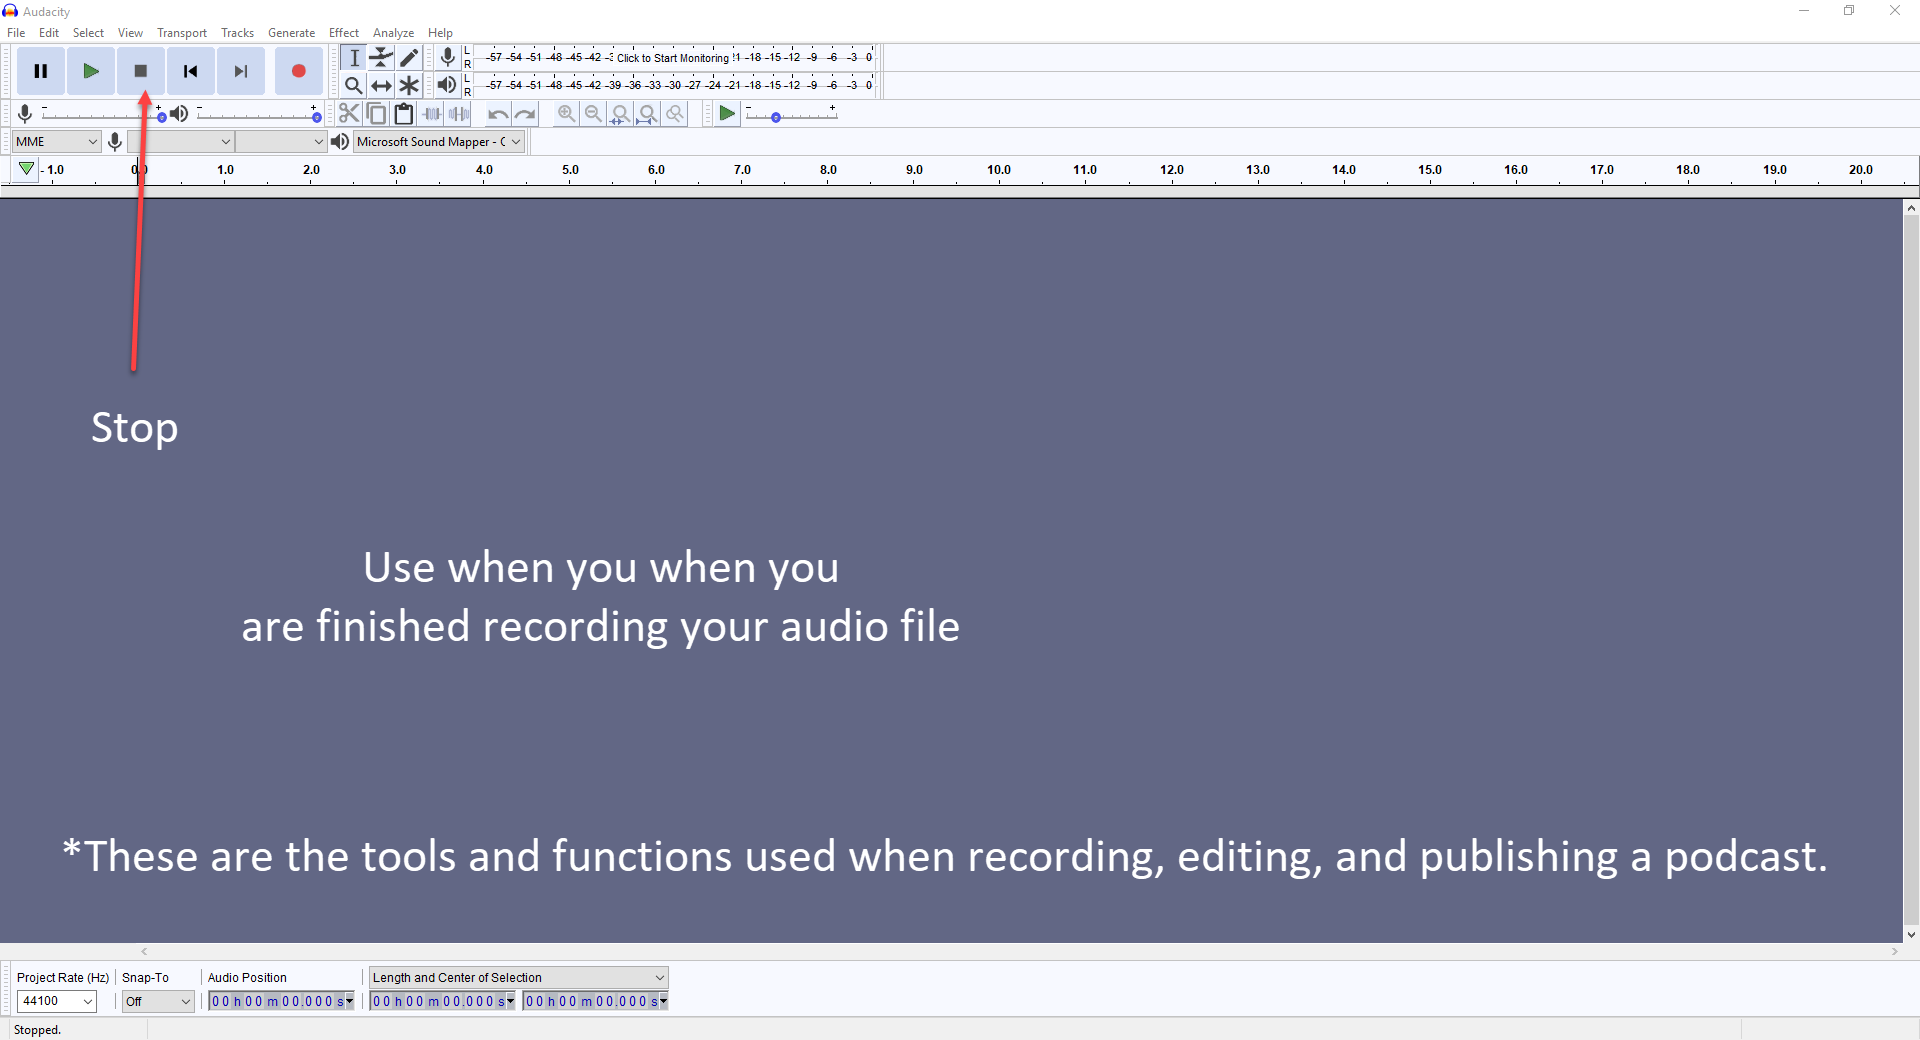
1. Recording & Playback
When you open Audacity, you can see that there is a bright red button at the top left. This is the Record button. This is the button you’ll press whenever you’re ready to record your a solo podcast, intro, outro, interviewee bio, self-sponsored ad, and any other number of reasons you would need to record your own voice.
Just hit the Record button, “Say what you need to say” (Do you hear John Mayer’s voice in the background?), then hit the Stop button whenever you’re done.
The finished product is an audio file. When you want to listen to the audio you just recorded, simply hit Skip to Start and then press the Play button. You should hear the exact message you just recorded.
Try it and see how it sounds!
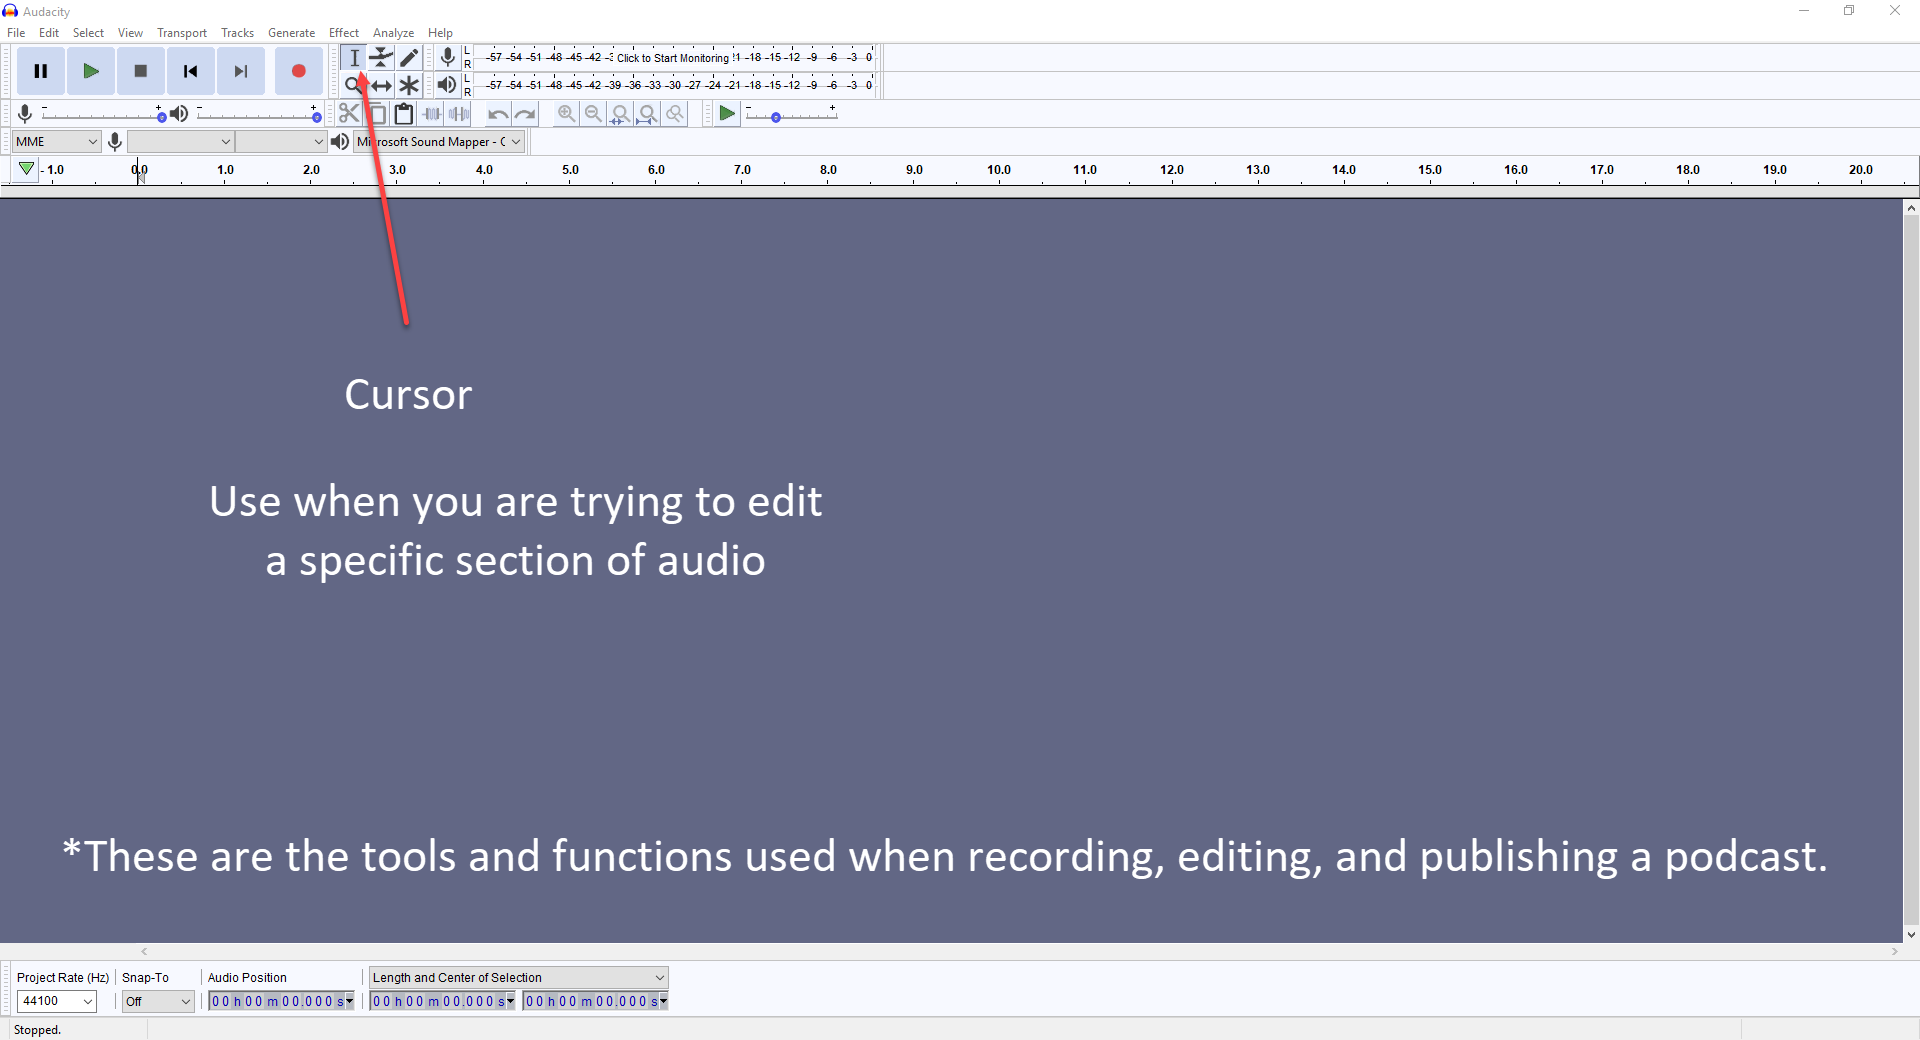
2. Selection Tool
This is the tool you use to navigate to different areas within your podcast episode. If you need to listen to the audio from a certain point within your file, use the Selection Tool to pick your place. Then hit play whenever you know it’s in the right spot.
You can also use the Selection Tool to grab areas of audio you need to delete, cut & paste, or any other number of reasons to select pieces of audio.
Here’s a screenshot of the Selection Tool.
3. Cutting and Deleting
There are times when you say “Ummm” or “Like” or you sneeze or clear your throat or bang your knee on the desk…
Trust me, there are many reasons for cutting and deleting sections of the audio out of your recording. But don’t let those little mistakes trip you up.
*I don’t do as much “editing out” now as I did at the beginning of my podcast. It takes a lot of time and I find that my audience enjoys a rougher, raw episode than a perfectly polished one. But that is also the premise behind The Proffitt Podcast.
“Keep it up. We all have to start somewhere…” is my motto!
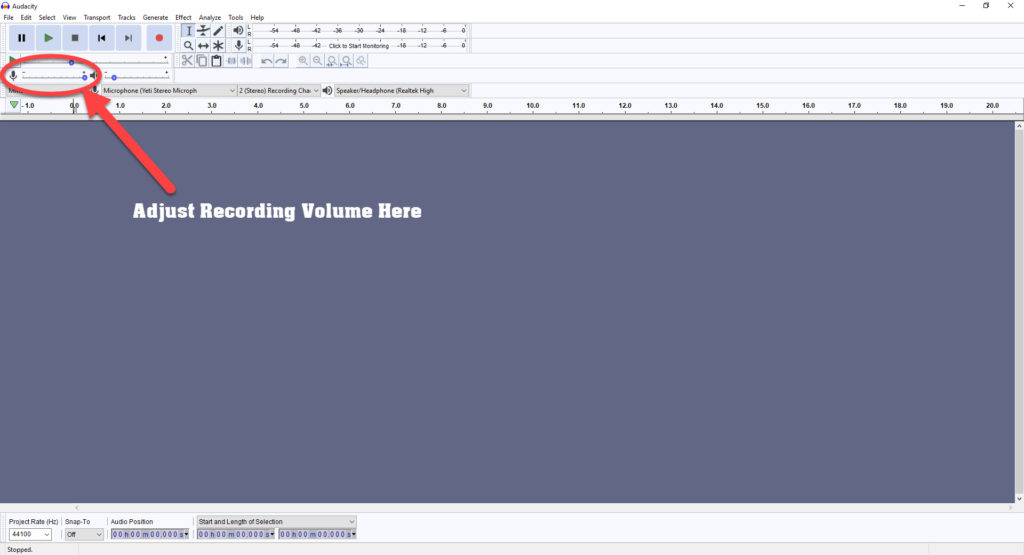
4. Recording Volume Adjustment
In case you didn’t already know this about me…I’m a very loud person! (Just ask my husband. Especially when I talk to him after my second cup of coffee in the morning!)
I’ve always been loud, I will always be loud, so I just have to adjust my surroundings and my recording volume whenever I’m producing my podcast.
In order to do this, I simply slide the recording volume scale to 75% of the total volume. I could probably go lower (because I really am THAT loud), but I find that 75 is a good number for me.
Any lower than that and I have to turn the volume way up when I listen to the playback. Any higher than that and I’m in the red zone.
Here is where you can adjust the recording volume for your podcast.
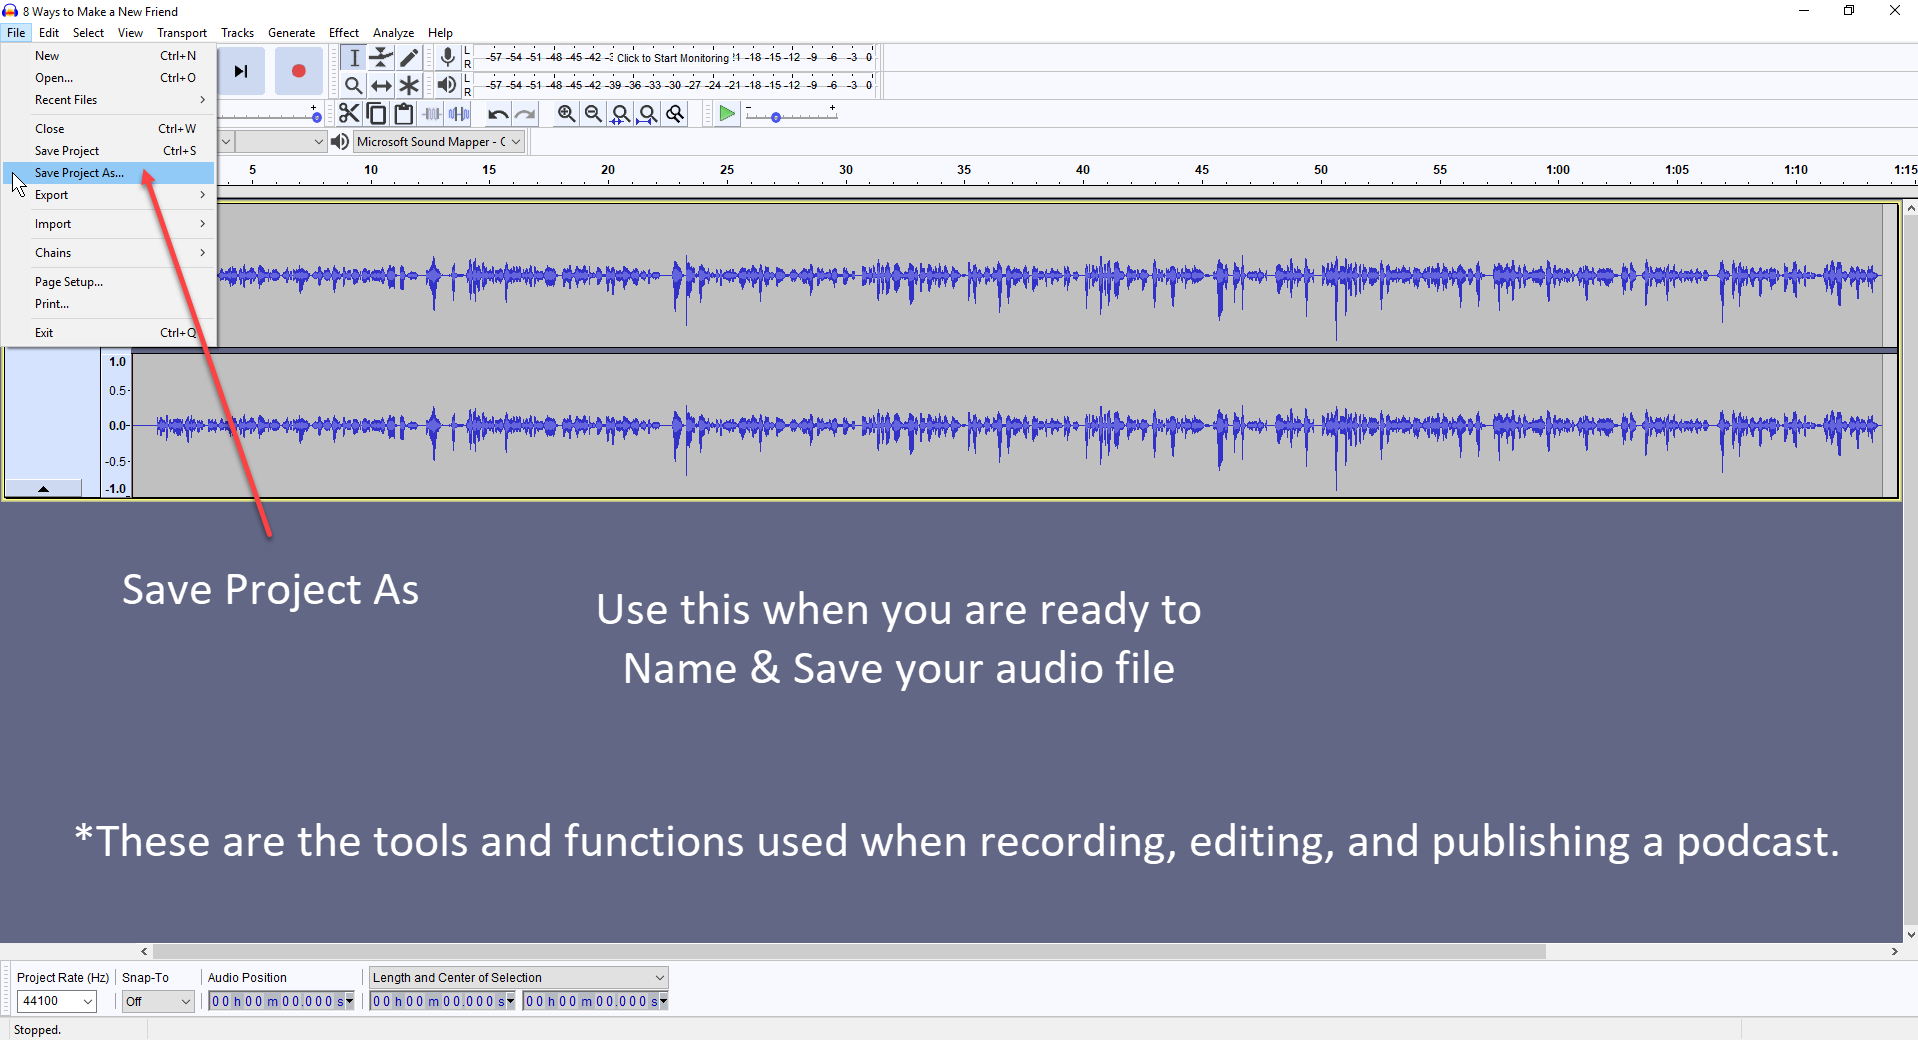
5. Saving Your Audio Files
This should be a familiar process if you’ve created other files on similar programs, but for the sake of this tutorial, we’re going to pretend like you haven’t.
Go to File, Save or Save As, find the appropriate older or create a new one, and name your audio file according to how you set up your show.
*Maintaining organization for your audio files is super important! Especially the more podcast episodes you have over time!
For example, I create an intro for each episode. So I would name that “Episode # – Intro” and then save it. This becomes very important when you start importing and exporting audio files. You want to make sure you’re grabbing the right audio.
TIP: Take some time and create a system for how you will name your podcast episode and all of the components that go into it.
Joined the Bootcamp Yet?
This is our FREE 5-day Podcast Video Series that walks you through the basics of podcasting!
START NOW
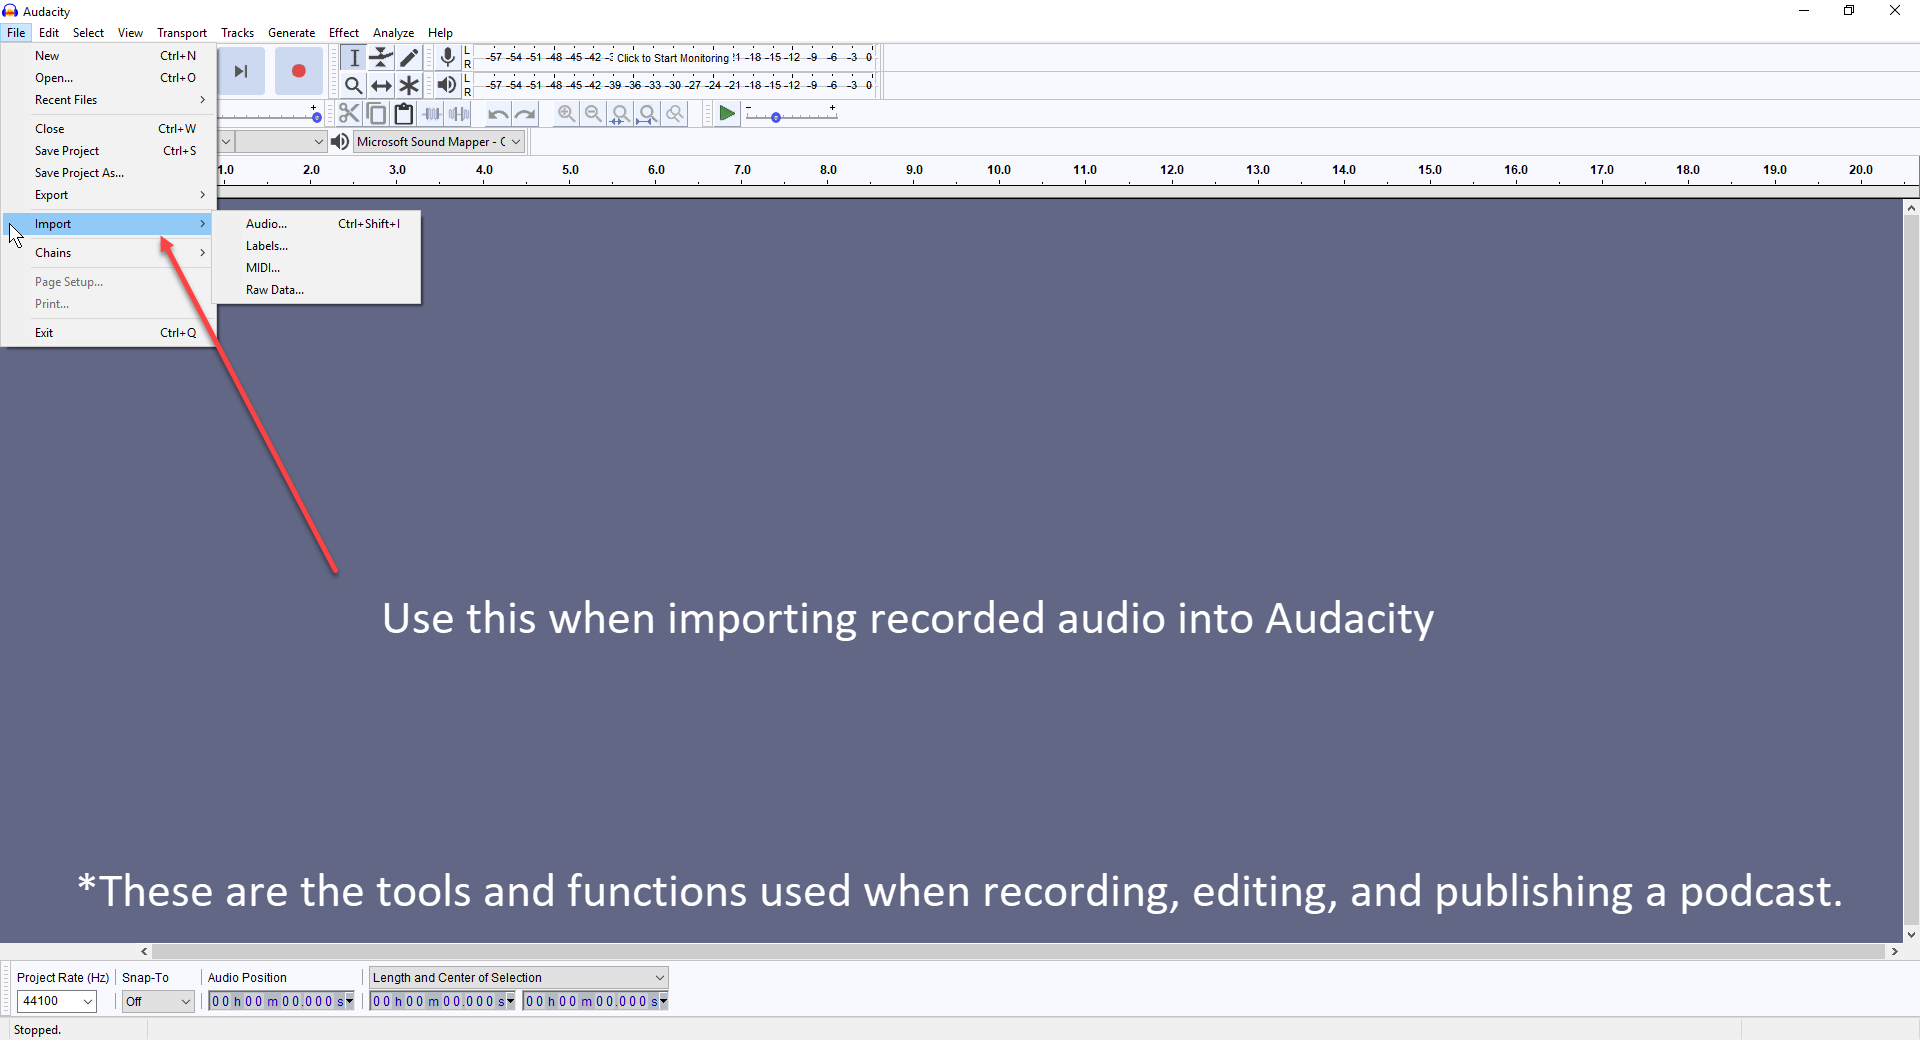
6. Importing
Many times you will need to Import different files into Audacity. This could be a pre-recorded interview, music, self-sponsored ads, intros, outros, etc. You’ll need to import all of those separate files into the one episode you’re working on.
You can select multiple files at one time to import, but I recommend importing files in the order that they’ll appear in that episode.
For example, you don’t want to have the outro and the outro music imported at the beginning of your episode. This just makes for more work for you.
Here’s a screenshot of how to Import audio files into your podcast episode.
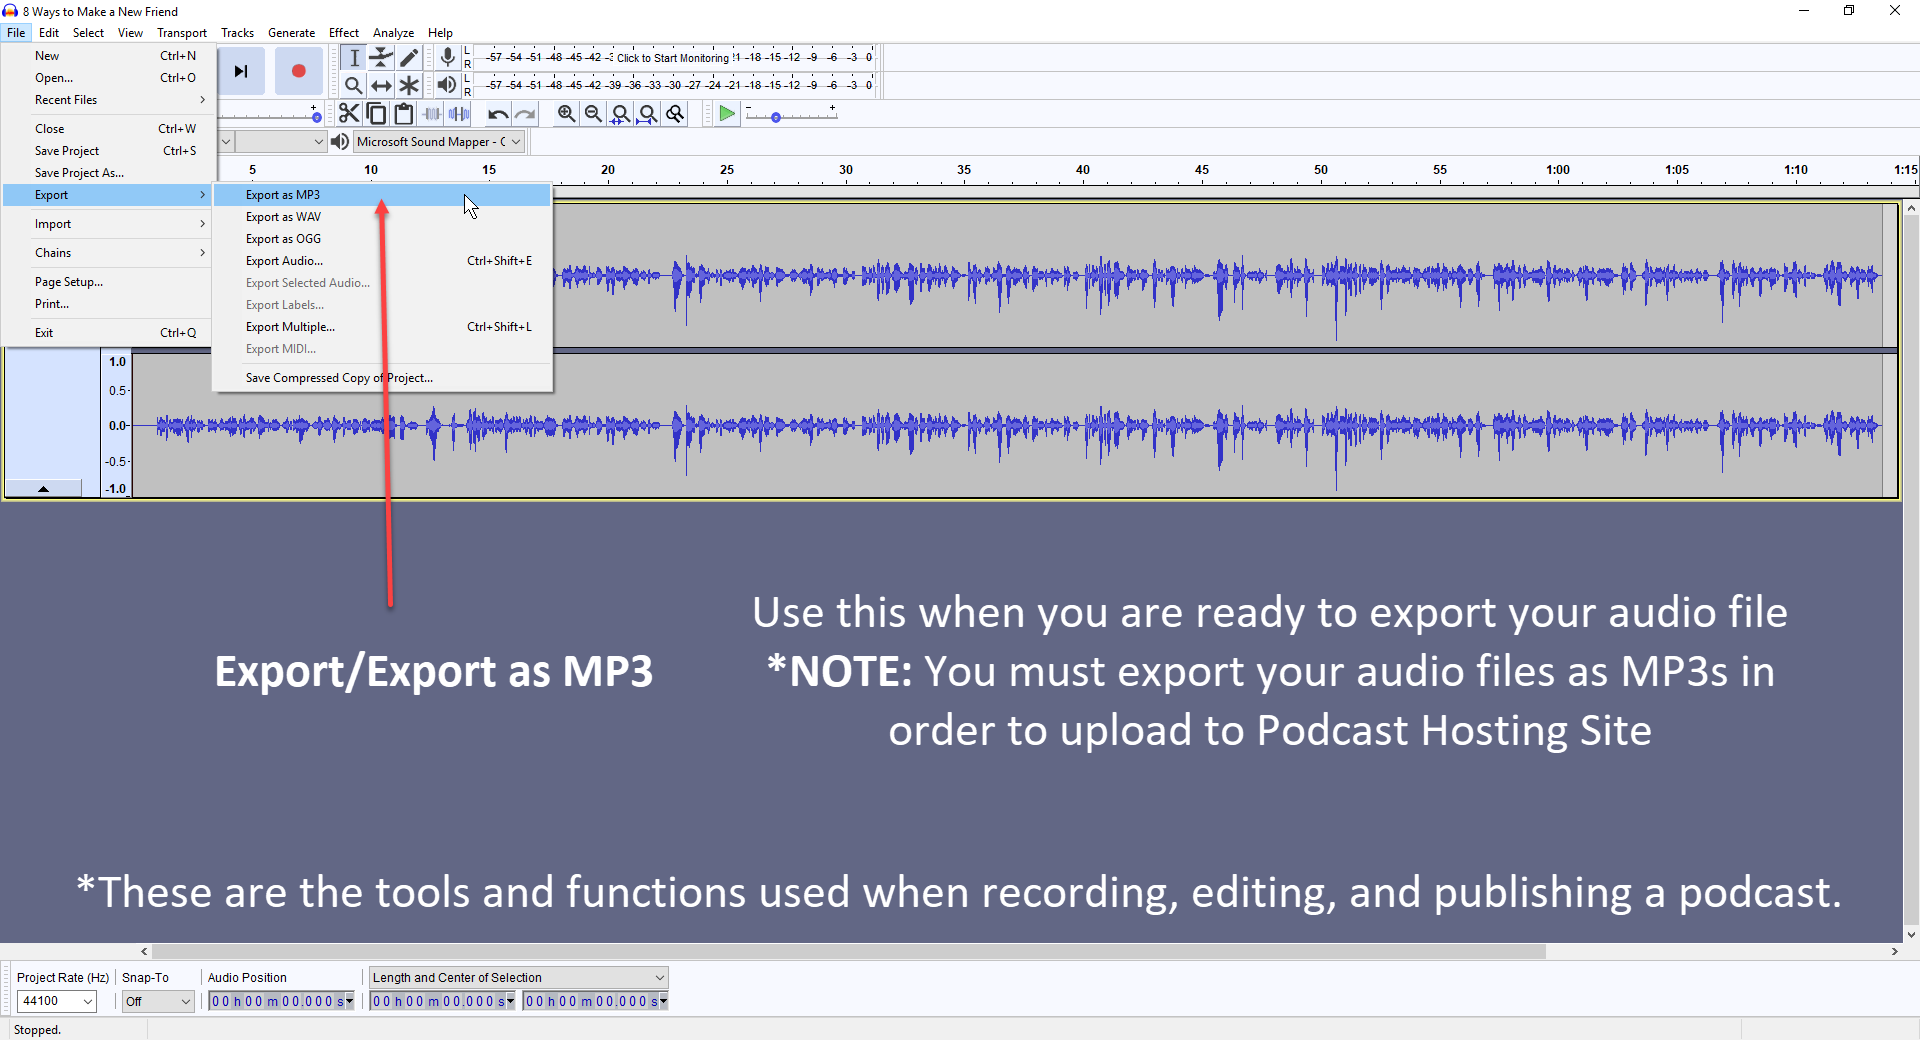
7. Exporting
In order to upload your audio file from Audacity into your hosting site, you must Export it as either an MP3 or a .WAV file.
*You have to install the LAME plugin for Audacity in order to export MP3s. See more info about LAME MP3 encoding here.
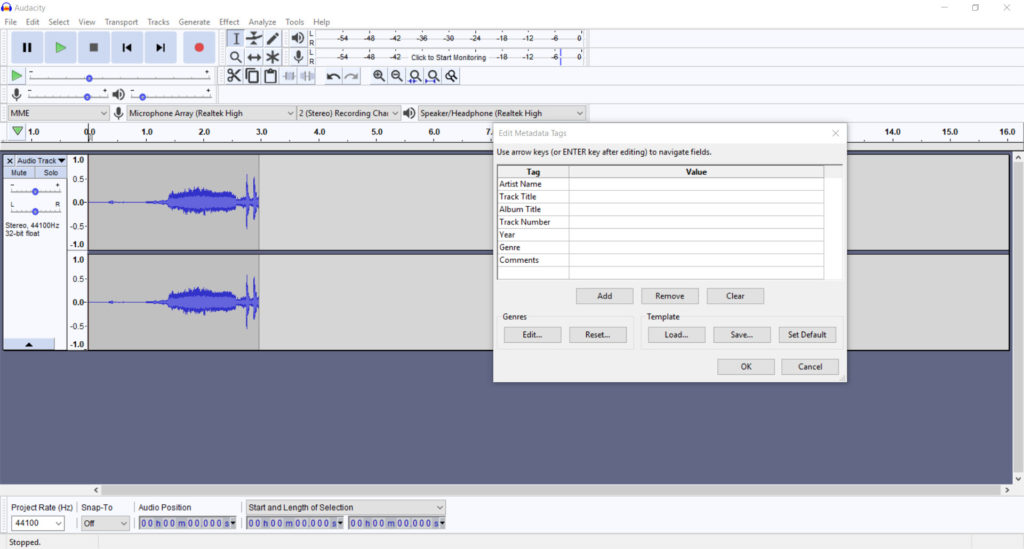
When you Export a file as an MP3 in Audacity, you’re given options on what to name each element of the audio file. (I don’t fill this out until I am ready to save and export my final podcast episode.)
The information that you fill out whenever you export an episode is the information that’ll be read by your media player: Episode Title, Episode Number, Podcast Name, etc.
Here’s a screenshot of exporting your podcast.
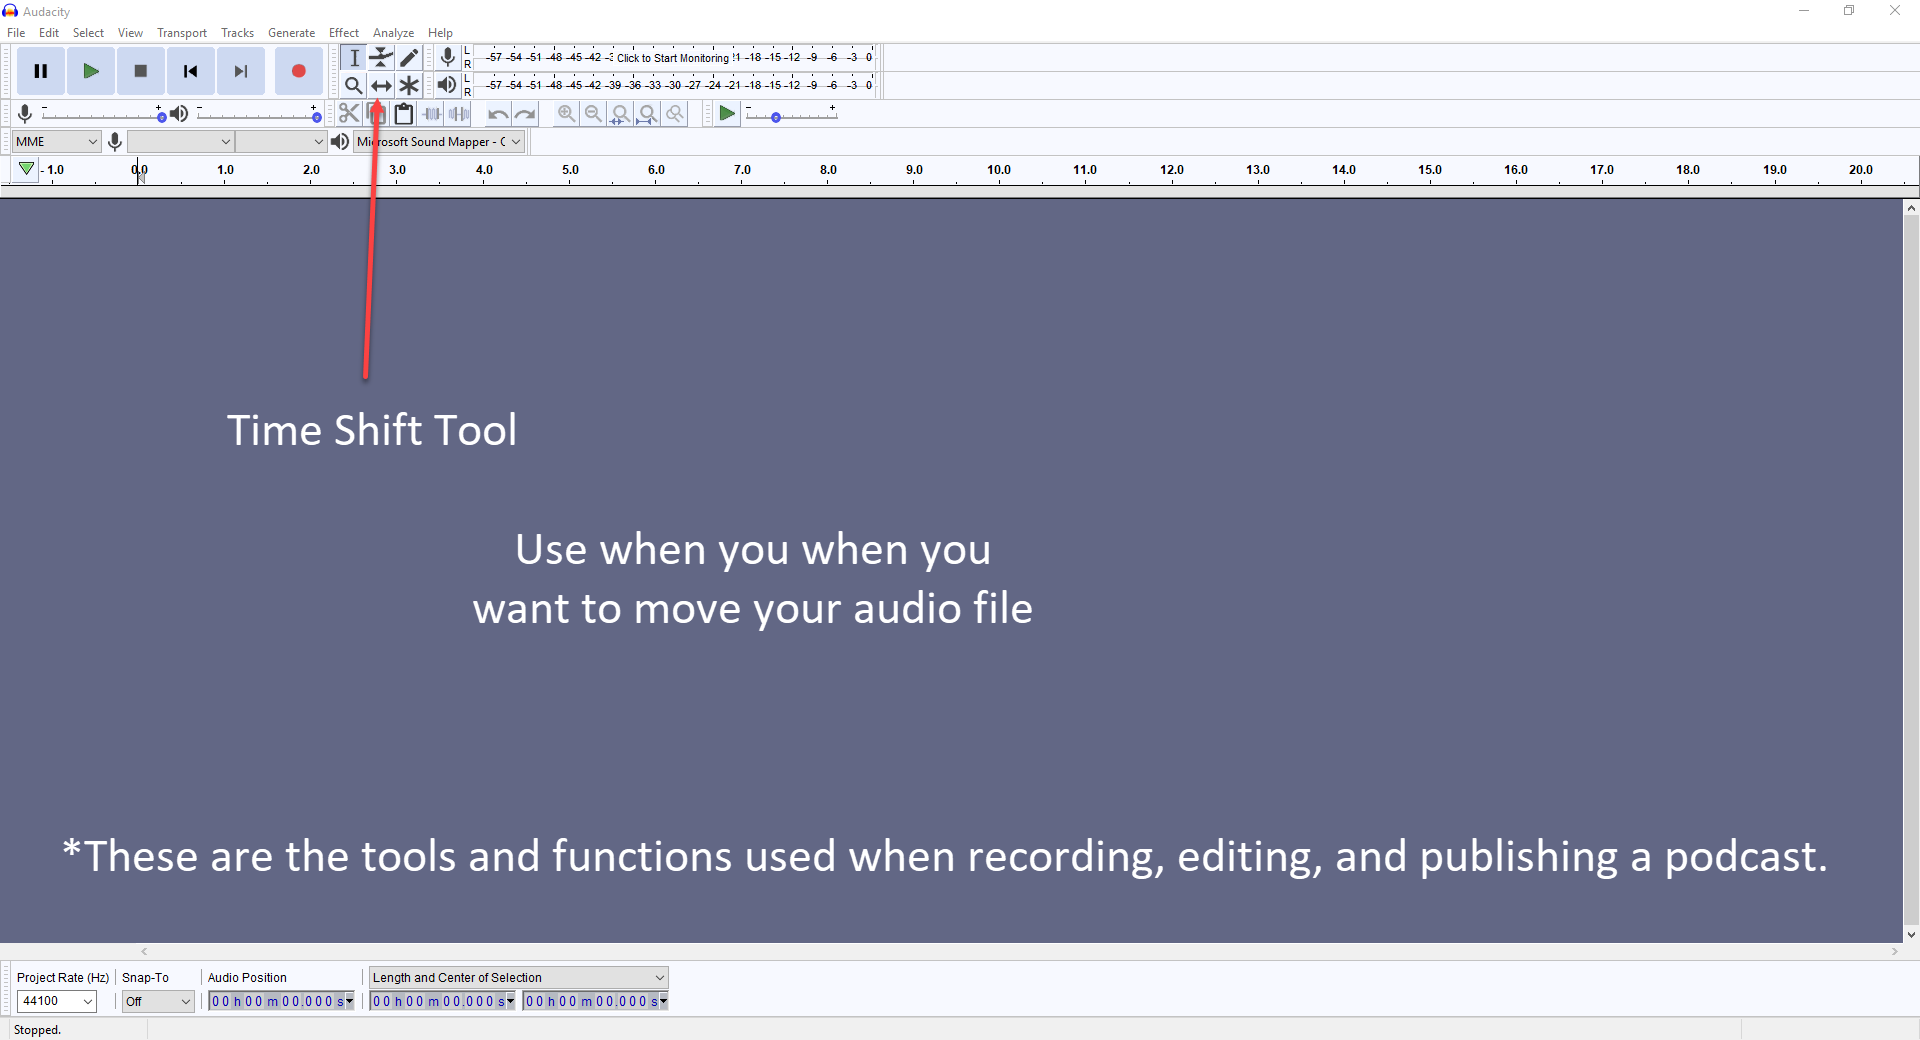
8. Time Shift Tool
The Time Shift Tool is what you’ll use to drag your audio files to just the right spot. You use this tool to move different files back and forth wherever you need them within the podcast episode.
If you have music that needs to be played before the episode intro, then you’ll use the Time Shift Tool to move the music to the point where you need it to be within the episode.
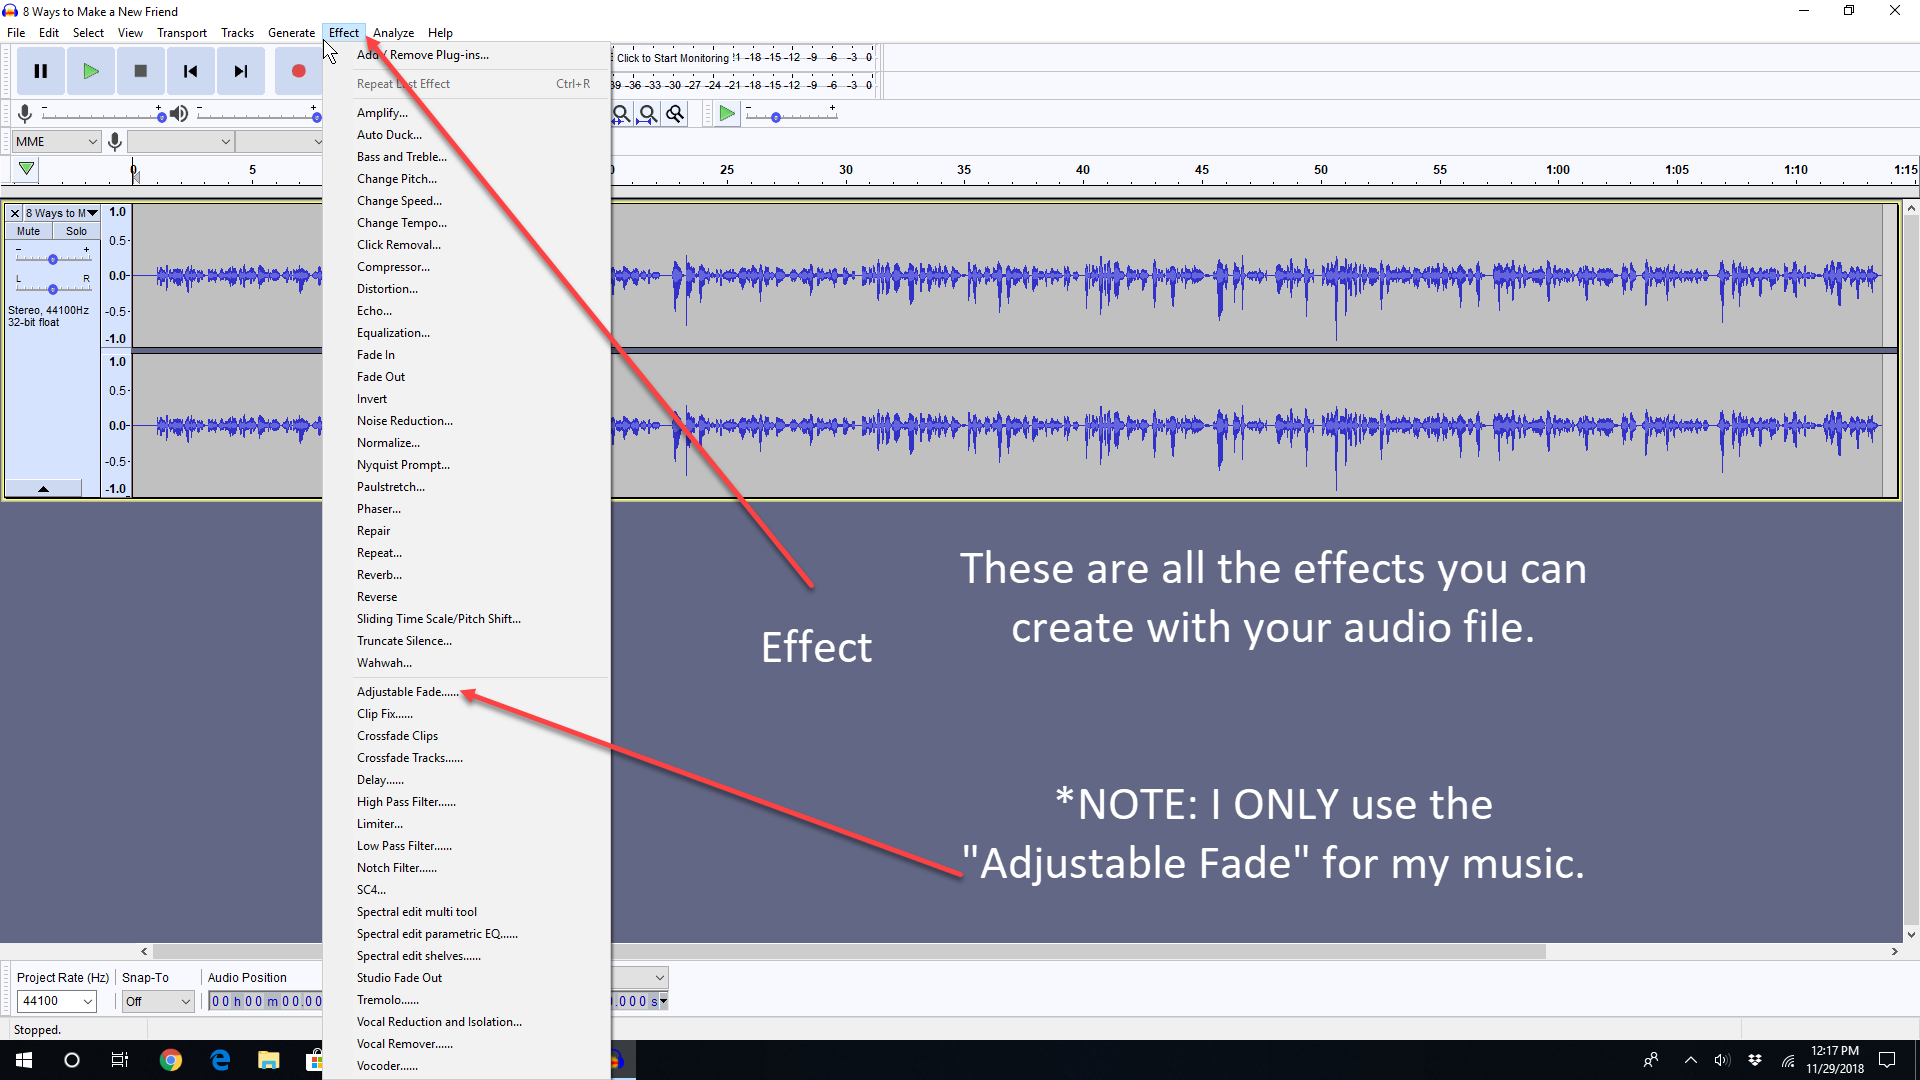
9. Effects
There can be an overwhelming that sets in when you open the effect option in Audacity, but don’t let that discourage you. I know there are probably a million different ways to use the different kinds of effects available within the program, but I only use one.
I use the adjustable fade effect within Audacity to have my music slowly fade in during my intro and my outro. I want it to be a subtle entrance in these parts of my podcast and not allowed disruptive new sense. Here is where you can find the effects I use for my podcast.
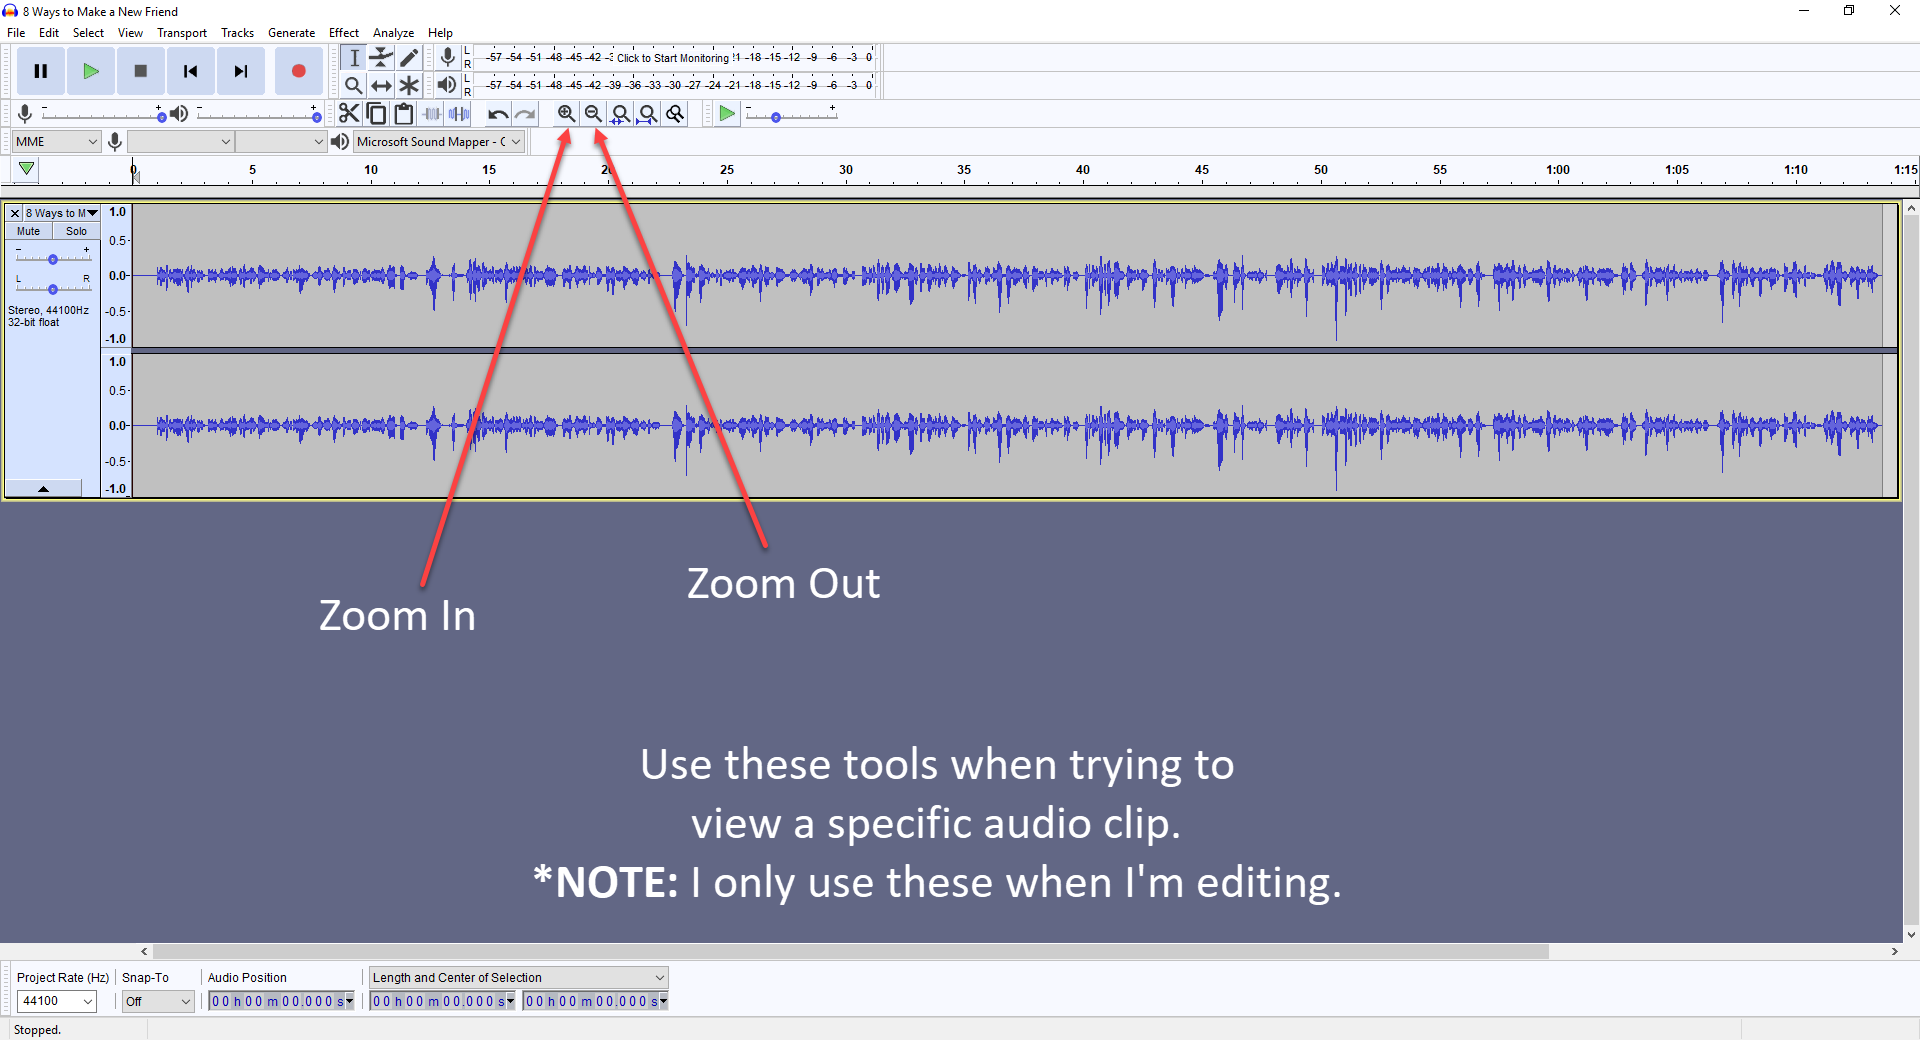
10. Zoom In and Zoom Out
When I first started podcasting, I had no idea when anyone would ever use the zoom in and zoom out tools. It wasn’t until I started knit taking a lot of my episodes that I realized I could really hone in on the exact part I needed to edit out with the zoom in tool.
It works exactly how it sounds. you place the selection tool where do you want to zoom in and click the zoom in button. The audio will get closer and you will be able to see in Faster increments What audio you are looking at. The more you click the zoom in the faster time will go. If you find yourself looking at nanoseconds of audio, you probably went too close. Simply click the zoom out button to get readjusted back to a normal time playback.
And there you have it!
Those are the basics of Audacity! All of these tips should give you everything you need to get started recording your podcast.
But if you find yourself with questions after you’ve played around with the software, feel free to reach out to me at Krystal@KrystalProffitt.com! I’d be happy to help!
Keep It Up! We All Have to Start Somewhere!
If you want to learn more about podcasting, be sure to check out the FREE tips & strategies in the Resource Library.
Great post! I’m not quite ready for podcasting, but I definitely will be in the future, and this post really made Audacity less intimidating ♡
Awe, yay…That makes me so happy to hear! I hope you’ll keep coming back for other podcasting tips and let me know when you’re ready to get started. I’d be happy to help! 🙂